Message Trace in Microsoft 365
Message Trace in Microsoft 365 is a valuable tool for investigating email delivery issues, tracking message flow, and ensuring that important emails are reaching their intended recipients. It provides a detailed record of the path that an email message takes through your organization’s email infrastructure, from the time it is sent until it is delivered to the recipient’s inbox.
How do you use this tool?? Below is a step-by-step guide on how to perform Message Trace in Microsoft 365.
Step 1: Access the Exchange Admin Center
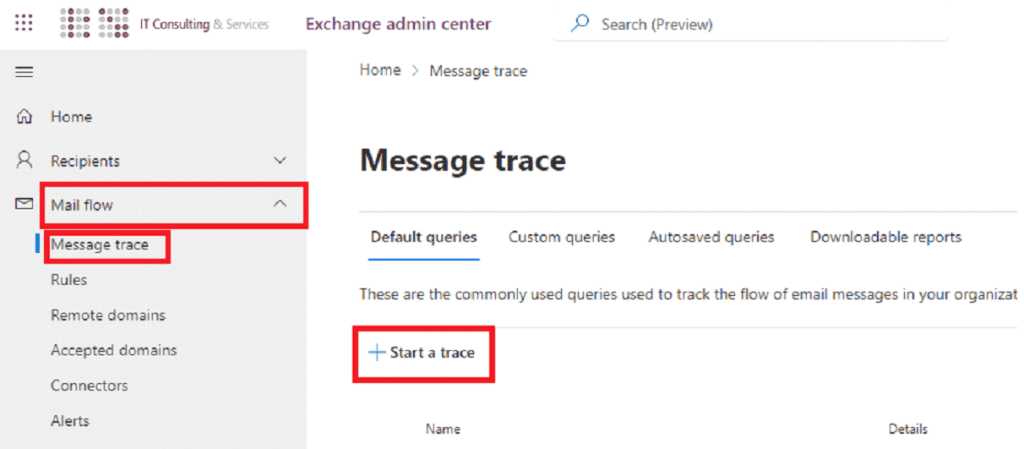
First you need to go to Exchange Admin Center (https://admin.exchange.microsoft.com).
Step 2: Starting a Message Trace
Then inside “Mail Flow” click on “Message Trace” and then “Start a Trace”.
Step 3: Message Trace Filtering Options
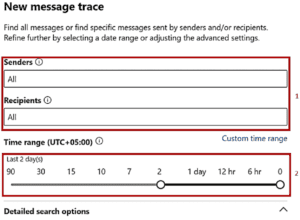
- By default, Message Trace will trace all messages. You can filter your trace by sender and recipient email address.
- You can select a tracing range in days.
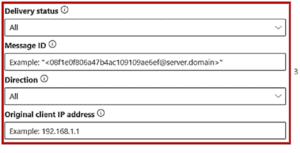
- In this section you can filter your message trace by delivery status. Also, if you know the message ID of an email then you can easily put it in this field. Message direction can be inbound or outbound. You can also insert the client IP if you know it.
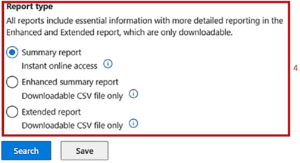
- You can select whether to access the report online or download it as a CSV file.
Can't find a message in Message Trace?
If a message is not found in Microsoft 365 Message Trace, there could be several reasons for this issue:
Message Hasn’t Reached Microsoft 365: The message may not have reached the Microsoft 365 environment yet. This can happen if there are delays in the email routing or if the message is still in transit.
Search Criteria: The search criteria you entered may not match the message you’re looking for. Ensure that you’ve entered the correct sender, recipient, date range, or other relevant filters.
Retention Policy: If the message is older and has been deleted based on your organization’s retention policies, it may no longer be available in Message Trace.
Hybrid Deployments: In hybrid environments where you have a combination of on-premises Exchange servers and Exchange Online (Microsoft 365), Message Trace may not cover on-premises email flows. You may need to check your on-premises message tracking logs separately.
Message Trace is a powerful tool that is essential for any IT administrator who is responsible for managing email infrastructure.


